
1. Hyrje
This manual provides detailed instructions for the setup, operation, maintenance, and troubleshooting of your Sharkoon Light² 200 Gaming Mouse. Please read this manual thoroughly before using the device to ensure optimal performance and longevity.
2. Përmbajtja e paketës
Verifikoni që të gjitha sendet janë të pranishme në paketim:
- Sharkoon Light² 200 Gaming Mouse
- Interchangeable Solid Top Cover (7g)
- Set of Replacement PTFE Glide Feet
- Manuali i Udhëzimeve
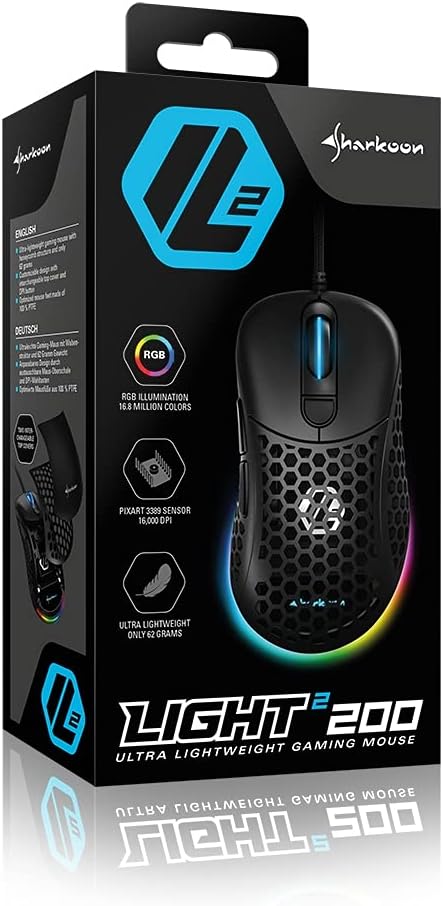
Image: The retail packaging for the Sharkoon Light² 200 Gaming Mouse, showing the mouse and its key features.
3. Konfigurimi
3.1 Lidhja e mausit
- Unpack the Sharkoon Light² 200 Gaming Mouse from its packaging.
- Plug the USB connector of the mouse cable into an available USB port on your computer.
- Sistemi operativ do të zbulojë dhe instalojë automatikisht drejtuesit e nevojshëm.

Image: The Sharkoon Light² 200 Gaming Mouse with its USB cable, ready for connection to a computer.
3.2 Instalimi i softuerit
For full customization and access to all features, download and install the Sharkoon gaming software from the official Sharkoon website. The software allows for DPI adjustments, button programming, and RGB lighting control.
- Visit the official Sharkoon webfaqe.
- Navigate to the support or downloads section for the Light² 200 Gaming Mouse.
- Download the latest version of the gaming software.
- Ndiqni udhëzimet në ekran për të përfunduar instalimin.
4. Përdorimi i mausit
4.1 Funksionet themelore
The Light² 200 features standard mouse buttons and a scroll wheel:
- Klikoni majtas: Butoni kryesor i veprimit.
- Klikoni me të djathtën: Buton dytësor veprimi, zakonisht për menutë e kontekstit.
- Rrota e lëvizjes: For vertical scrolling. Can also be pressed for a middle-click function.
- Butonat anësore: Two buttons located on the left side, typically for 'forward' and 'back' navigation.
- Butoni DPI: Located behind the scroll wheel, used to cycle through DPI settings.

Imazh: Ana view of the Sharkoon Light² 200 Gaming Mouse, highlighting the two programmable side buttons and the honeycomb structure.
4.2 Rregullimi i DPI
The optical PixArt sensor supports up to 16,000 DPI. You can adjust the DPI sensitivity using the dedicated DPI button behind the scroll wheel or through the Sharkoon gaming software. The RGB lighting on the scroll wheel and rear of the mouse indicates the current DPI profile.
4.3 butona të programueshëm
The Light² 200 features six programmable buttons. Use the Sharkoon gaming software to assign custom functions, macros, or key bindings to these buttons for an optimized gaming experience.
4.4 Përshtatja e Ndriçimit RGB
The mouse features adjustable RGB illumination on the scroll wheel and the back end. The gaming software allows you to customize colors, effects, and brightness to match your preferences or gaming setup.
4.5 Modular Design: Changing the Top Cover
The Light² 200 has a modular design, allowing you to change the top surface. The default honeycomb top cover can be replaced with a closed 7-gram alternative for a different feel or aesthetic.
- Gently lift the rear edge of the honeycomb top cover to detach it. It is held by magnets.
- Align the replacement solid top cover with the mouse body and gently press it down until the magnets secure it in place.

Image: The Sharkoon Light² 200 Gaming Mouse with its honeycomb top cover removed, revealing the internal structure and magnetic attachment points.
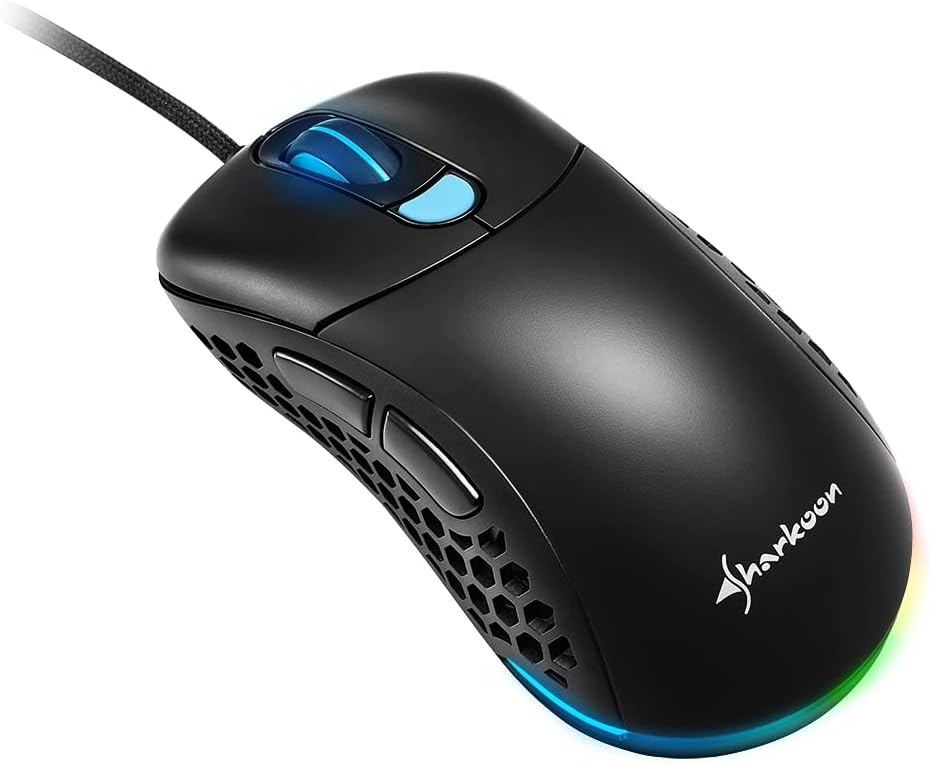
Image: The Sharkoon Light² 200 Gaming Mouse with the alternative solid top cover installed, providing a different aesthetic and feel.
5. Mirëmbajtja
5.1 Pastrimi i Mausit
To maintain optimal performance, regularly clean your mouse:
- Shkëputni mausin nga kompjuteri juaj.
- Përdorni një leckë të butë dhe të thatë për të fshirë sipërfaqen e mausit.
- Për papastërti kokëfortë, pakampLani leckën me ujë ose me një tretësirë të butë pastrimi. Shmangni kimikatet e ashpra.
- Use compressed air to clear dust from the honeycomb structure and around buttons.
- Clean the optical sensor area with a cotton swab lightly dampe shoqëruar me alkool izopropil.
5.2 Replacing PTFE Glide Feet
The PTFE glide feet ensure smooth movement. If they become worn, replace them using the included spare set:
- Carefully peel off the old PTFE feet using a thin, non-abrasive tool.
- Clean the surface where the feet were attached to ensure no residue remains.
- Peel the new PTFE feet from their backing and carefully apply them to the corresponding areas on the mouse's underside.
- Shtypni fort për të siguruar ngjitjen e duhur.

Image: The underside of the Sharkoon Light² 200 Gaming Mouse, showing the optical sensor, the DPI switch, and the four white PTFE glide feet.
6. Troubleshooting
- Mausi nuk përgjigjet:
- Ensure the USB cable is securely connected to a working USB port.
- Try connecting the mouse to a different USB port or another computer to rule out port or system issues.
- Rinisni kompjuterin tuaj. - DPI settings not changing:
- Ensure the Sharkoon gaming software is installed and running.
- Check if the DPI button is functioning correctly. - Ndriçimi RGB nuk funksionon ose është i pasaktë:
- Verify that the Sharkoon gaming software is installed and that lighting settings are configured correctly.
- Ensure the mouse is properly connected. - Mouse movement is erratic or imprecise:
- Pastroni sensorin optik në pjesën e poshtme të mausit.
- Ensure you are using the mouse on a suitable surface (e.g., a mouse pad).
- Check for any physical obstructions around the sensor. - Butonat që nuk përgjigjen:
- Check button assignments in the Sharkoon gaming software.
- Ensure no physical debris is obstructing the button mechanism.
7. Specifikimet
| Veçori | Detaj |
|---|---|
| Emri i modelit | Drita² 200 |
| Numri i modelit të artikullit | 4044951029013 |
| Dimensionet e produktit | 4.72 x 2.6 x 1.65 inç (120 x 66 x 42 mm) |
| Pesha e artikullit | 2.19 ons (62 gram) |
| Teknologjia e zbulimit të lëvizjes | Optical (PixArt Sensor) |
| Maksimumi i DPI | 16,000 DPI |
| Butonat e programueshëm | 6 |
| Teknologjia e lidhjes | USB |
| Veçori e veçantë | RGB LED Lights, Modular Design |
| Prodhuesi | Sharkoon Technologies |
8. Garancia dhe Mbështetja
8.1 Informacioni i garancisë
Sharkoon products are covered by a manufacturer's warranty against defects in materials and workmanship. The specific warranty period and terms may vary by region. Please retain your proof of purchase for warranty claims.
8.2 Mbështetje teknike
For technical assistance, driver downloads, or further information, please visit the official Sharkoon webfaqe:
- Webfaqe: www.sharkoon.com
You may also find FAQs and troubleshooting guides on their support pages.