Produkti Mbiview
This manual provides detailed instructions for the assembly, operation, and maintenance of your PayLessHere Office Computer Gaming Chair. Designed for ergonomic comfort and versatility, this chair features a breathable mesh back, adjustable height, 360-degree swivel, and lumbar support, making it suitable for both office work and gaming.
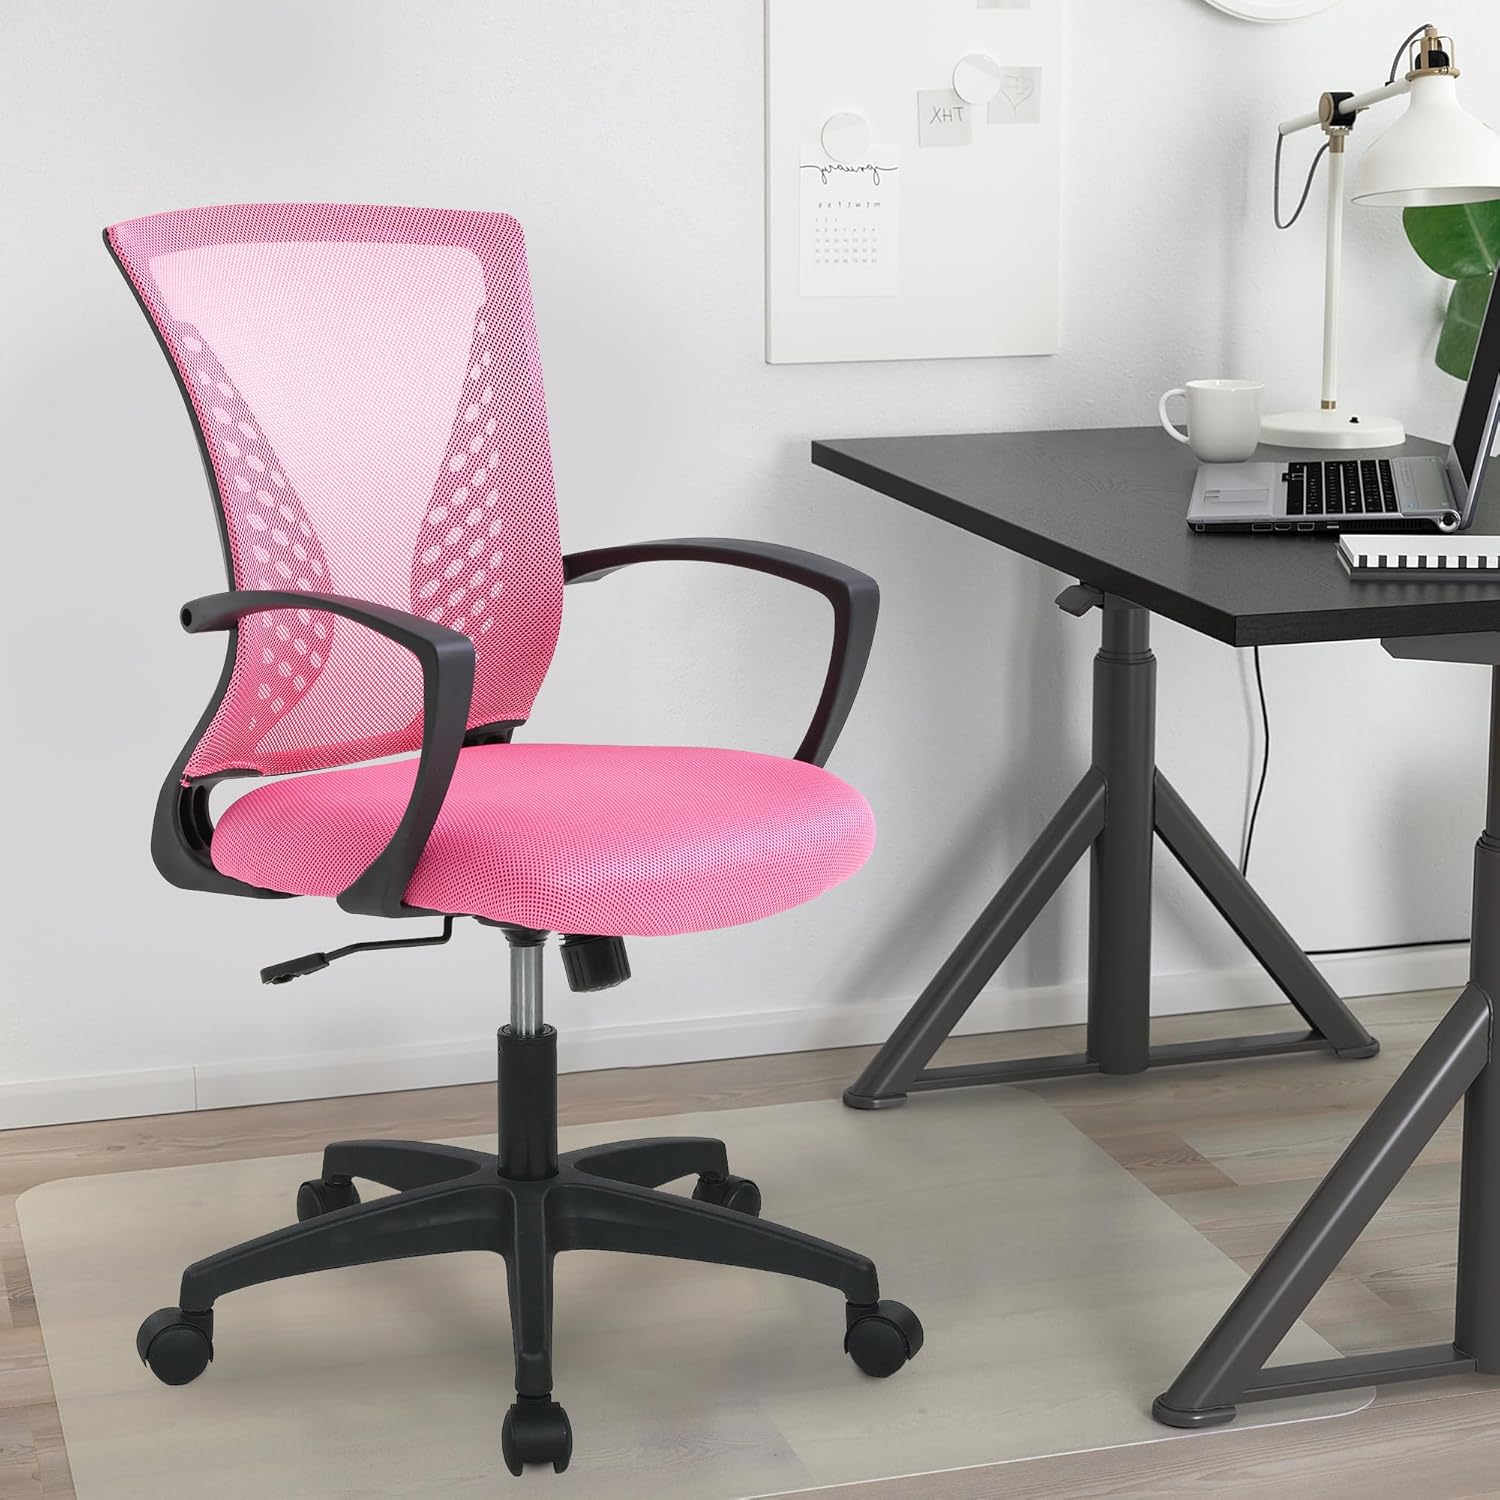
Image: The PayLessHere Office Computer Gaming Chair in pink, set up in a home office environment.
Informacioni i Sigurisë
Do not exceed the maximum weight capacity of 250 pounds. Ensure the chair is properly assembled and stable before use.
Always follow assembly instructions carefully. Keep small parts away from children. Regularly inspect the chair for loose screws or damaged components and tighten or replace as necessary.
Përmbajtja e paketës
Para fillimit të montimit, sigurohuni që të gjithë përbërësit të jenë të pranishëm:
- Mbështetëse Karrigeje (1)
- Jastëk vendesh (1)
- Mbështetëse krahësh (2)
- Cilindër ngritës gazi (1)
- Baza e Yjeve (1)
- Rrota me rrota (5)
- Pllaka e Mekanizmit (1)
- Screws and Allen Wrench (1 set)
Udhëzimet e montimit
Follow these steps to assemble your PayLessHere Office Computer Gaming Chair:
Hapi 1: Bashkangjitni rrotat në bazë
Futni pesë rrotat me rrota në vrimat në fund të secilës këmbë të bazës yllore. Shtypini fort derisa të fiksohen në vendin e tyre.

Image: Close-up of the chair's star base and caster wheels, highlighting 360-degree rotation and floor protection.
Step 2: Insert Gas Lift Cylinder
Place the gas lift cylinder into the center hole of the assembled star base. Do not remove the red cap from the gas lift until instructed.

Imazh: I detajuar view of the chair's components, including the certified gas rod (lift cylinder).
Step 3: Attach Mechanism Plate to Seat
Align the mechanism plate with the screw holes on the underside of the seat cushion. Ensure the front of the mechanism faces the front of the seat. Secure with screws using the provided Allen wrench.
Hapi 4: Ngjitni mbështetëset e krahëve
Attach the armrests to the sides of the seat cushion using the designated screws. Pay attention to the 'L' (left) and 'R' (right) markings on the armrests.
Step 5: Connect Backrest to Seat
Align the backrest with the attachment points on the seat cushion or mechanism plate. Secure with screws.
Step 6: Assemble Seat to Base
Carefully place the assembled seat (with mechanism and armrests) onto the gas lift cylinder. The tapered end of the gas lift should fit securely into the mechanism plate.
Video e Asamblesë
Video: A demonstration of the adjustable features of the office chair, including height and swivel, for home comfort.
Udhëzimet e funksionimit
Familiarize yourself with the chair's adjustable features for optimal comfort:
Rregullimi i lartësisë
To adjust the seat height, pull the lever located under the right side of the seat upwards. While seated, lift your weight slightly to raise the chair, or remain seated to lower it. Release the lever to lock the height.

Image: Diagram illustrating the height adjustment lever and 360-degree swivel function of the chair.
Tilt and Recline Function
The chair features a reclining backrest. To activate the tilt, pull the lever (often the same as the height adjustment lever, or a separate one) outwards. To lock the backrest in an upright position, push the lever inwards. The tension of the tilt can be adjusted by rotating the round knob located under the front of the seat.
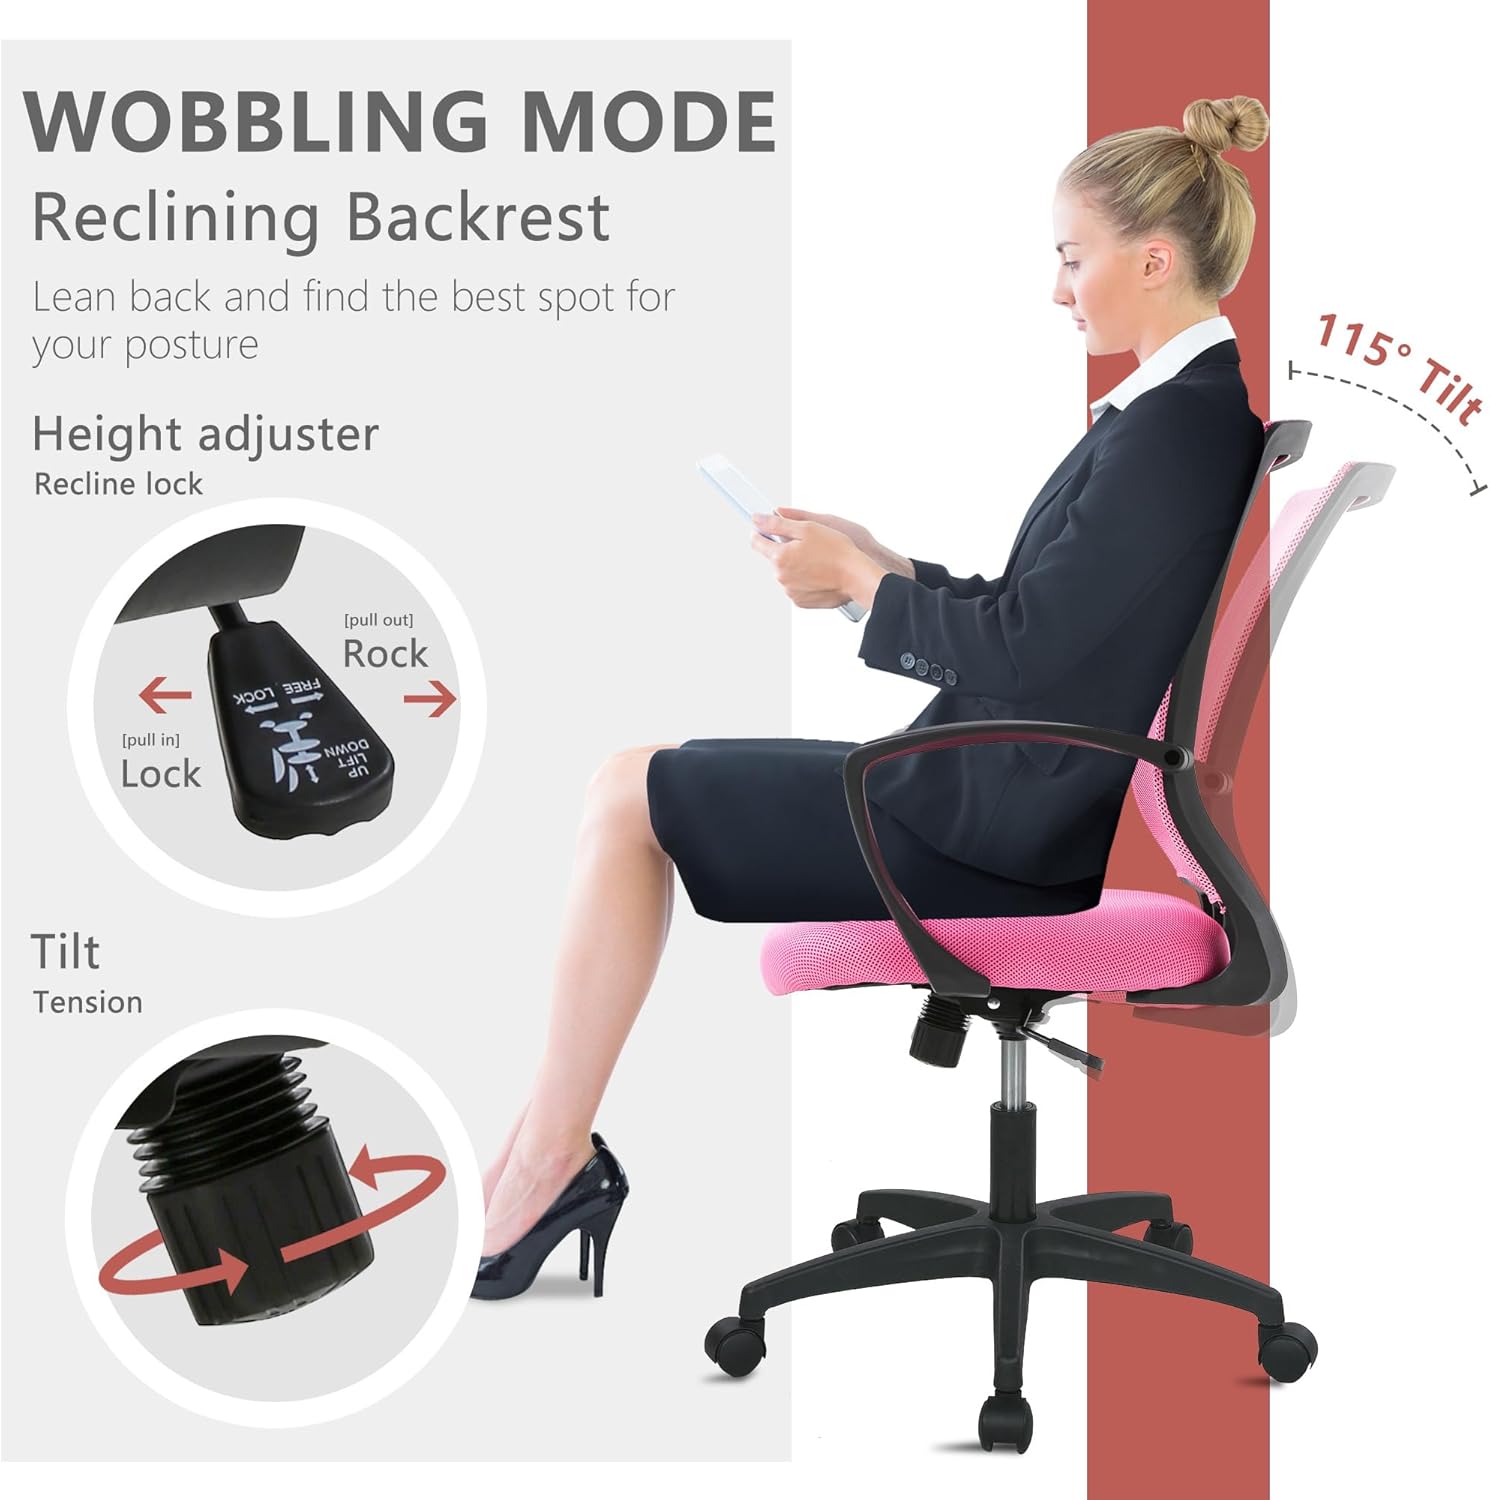
Image: Illustration of the chair's wobbling mode, showing the reclining backrest and the tilt tension adjustment knob.
Funksioni rrotullues
Karrigia është projektuar të rrotullohet 360 gradë, duke lejuar lëvizje të lehtë dhe akses në zona të ndryshme të hapësirës suaj të punës pa pasur nevojë të ripoziciononi të gjithë karrigen.
Mirëmbajtja
Proper maintenance will extend the life of your chair:
- Pastrimi: For mesh and fabric surfaces, use a soft cloth with mild soap and water. Avoid harsh chemicals. For the plastic and metal parts, wipe with a damp pëlhurë.
- Inspektimi: Kontrolloni periodikisht të gjitha vidat dhe bulonat për t'u siguruar që janë të shtrënguara. Shtrëngojini përsëri nëse është e nevojshme për të ruajtur stabilitetin dhe sigurinë.
- Hedhësit: Keep caster wheels clean from hair and debris to ensure smooth rolling.
Zgjidhja e problemeve
Nëse hasni ndonjë problem me karrigen tuaj, referojuni problemeve dhe zgjidhjeve të zakonshme të mëposhtme:
| Problem | Shkaku i mundshëm | Zgjidhje |
|---|---|---|
| Karrigia nuk rregullon lartësinë | Gas lift lever not engaged or gas lift faulty. | Ensure the lever is fully pulled up/down. If issue persists, contact customer support for gas lift replacement. |
| Karrigia lëkundet | Vida të lirshme ose dysheme e pabarabartë. | Kontrolloni dhe shtrëngoni të gjitha vidat e montimit. Sigurohuni që karrigia të jetë në një sipërfaqe të sheshtë dhe të rrafshët. |
| Rrotat nuk rrotullohen pa probleme | Mbeturina në rrota ose rrota të dëmtuara. | Remove any hair or debris from the caster wheels. If damaged, replace casters. |
| Mbështetësja e shpinës nuk përkulet ose nuk bllokohet | Mekanizmi i animit është i bllokuar ose tensioni është shumë i lartë. | Pull the tilt lever outwards to unlock. Adjust the tilt tension knob to a lower setting. |
Specifikimet
| Veçori | Detaj |
|---|---|
| Markë | Paguaj Më Pak Këtu |
| Emri i modelit | Office Computer Gaming Chair |
| Ngjyra | Rozë |
| Dimensionet e produktit (D x W x H) | 23"D x 22"L x 40"H |
| Thellësia e sediljes | 17 inç |
| Pesha e artikullit | 21 paund |
| Materiali | Mesh (Back), Foam (Seat) |
| Stil prapa | Mbrapa me rrjetë |
| Karakteristika të veçanta | Cushion Availability, Ergonomic, Rolling, Adjustable Height, Swivel |
| Lëvizja e bazës së mobiljeve | Rrotullues |
| Numri i pozicionit të shtrirë | 2 deri në 5 |
| Kapaciteti maksimal i peshës | 250 pounds (as per safety information) |
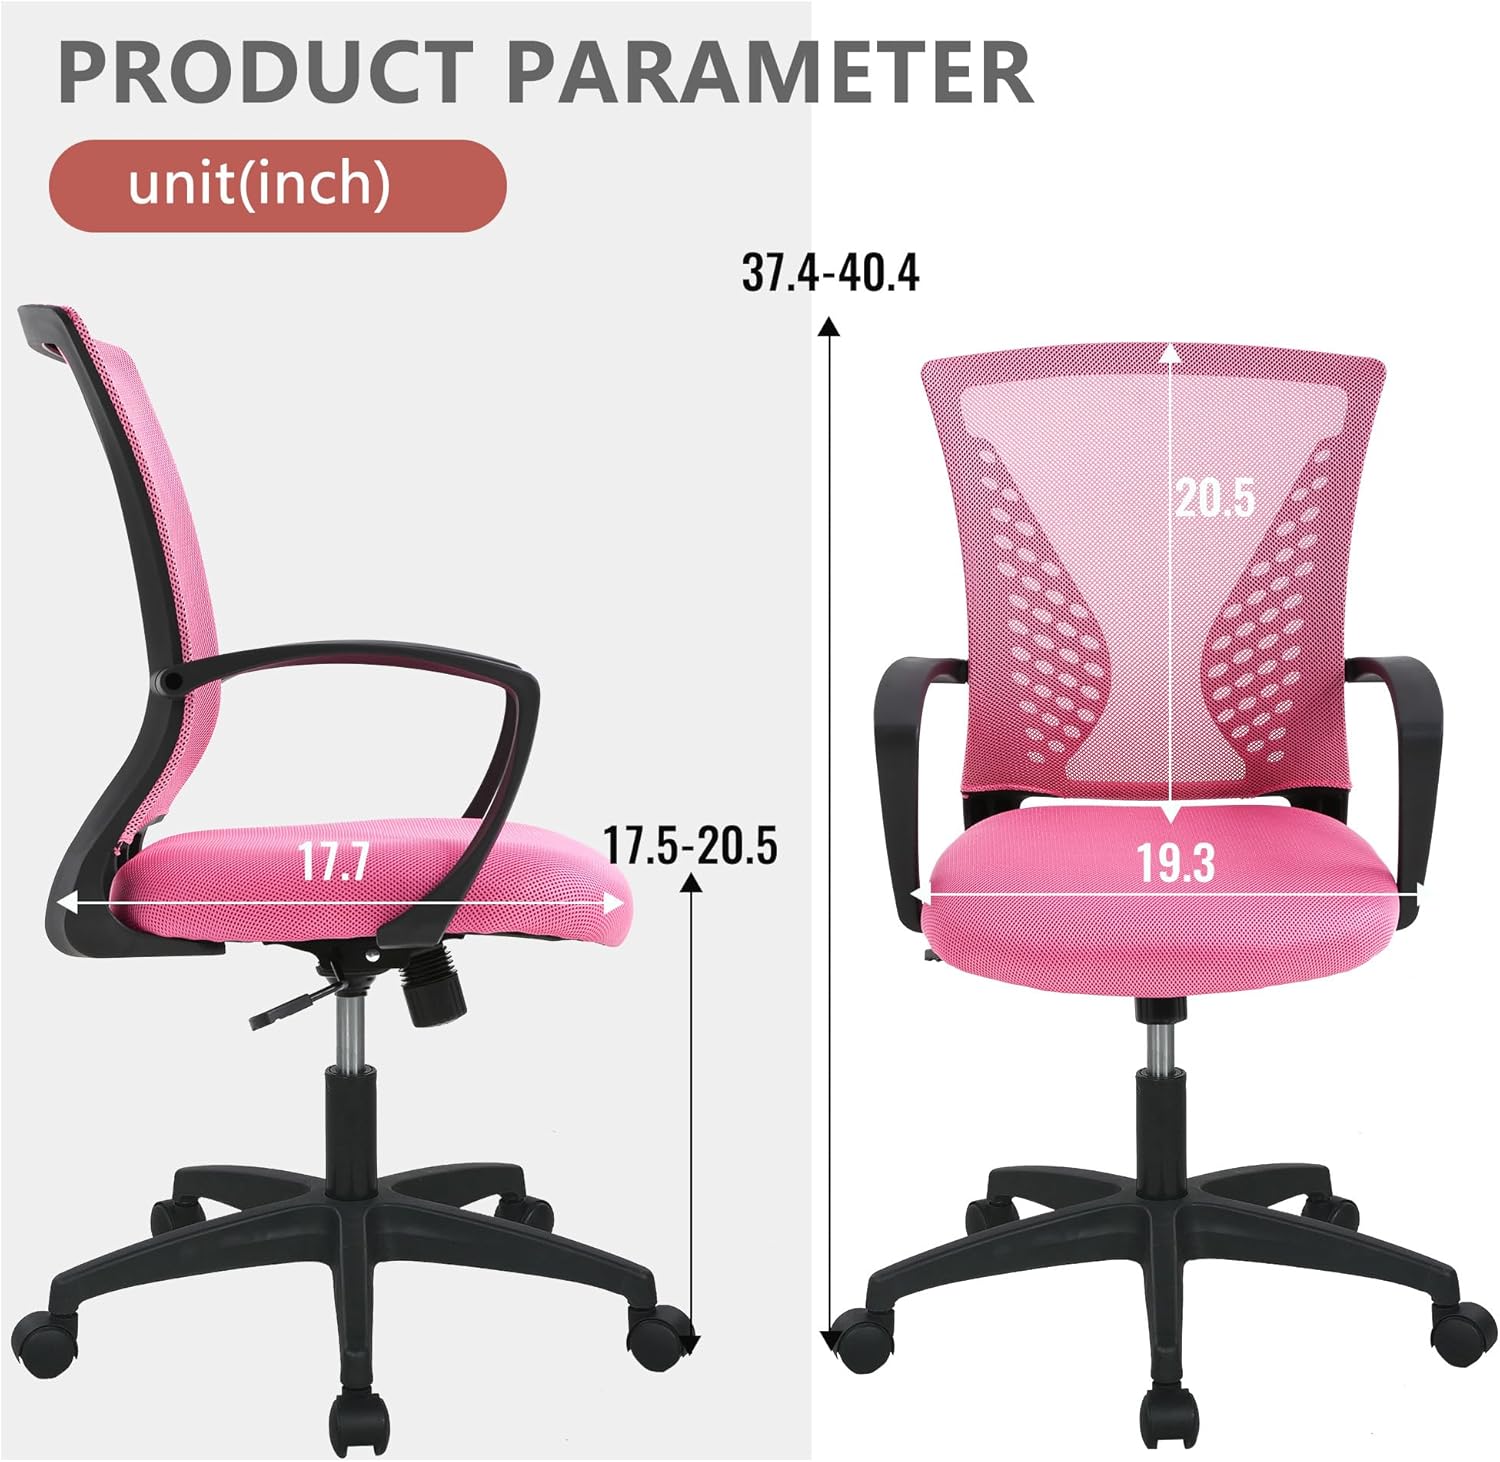
Image: Detailed product parameter diagram showing chair dimensions in inches.
Garancia dhe Mbështetja
For warranty information, technical support, or to order replacement parts, please contact PayLessHere customer service through the retailer where the product was purchased. Keep your purchase receipt for warranty claims.