1. Hyrje
This manual provides instructions for the installation, operation, and maintenance of your new replacement cooling fan for the GMKtec NucBox K7 Mini PC. This fan is designed to ensure optimal thermal performance for your device, preventing overheating and maintaining system stability. Please read this manual thoroughly before proceeding with installation.
2. Informacion mbi sigurinë
- Always disconnect the Mini PC from its power source before opening the case or performing any installation.
- Handle electronic components with care to avoid damage from static electricity. Consider using an anti-static wrist strap.
- Keep small parts, such as screws, away from children.
- Nëse nuk jeni të sigurt për ndonjë hap, konsultohuni me një teknik të kualifikuar.
- Do not force connectors. Ensure proper alignment before applying pressure.
3. Përmbajtja e paketës
Verifikoni që të gjitha artikujt janë të pranishëm në paketimin tuaj:
- 1x Replacement Cooling Fan for GMKtec NucBox K7
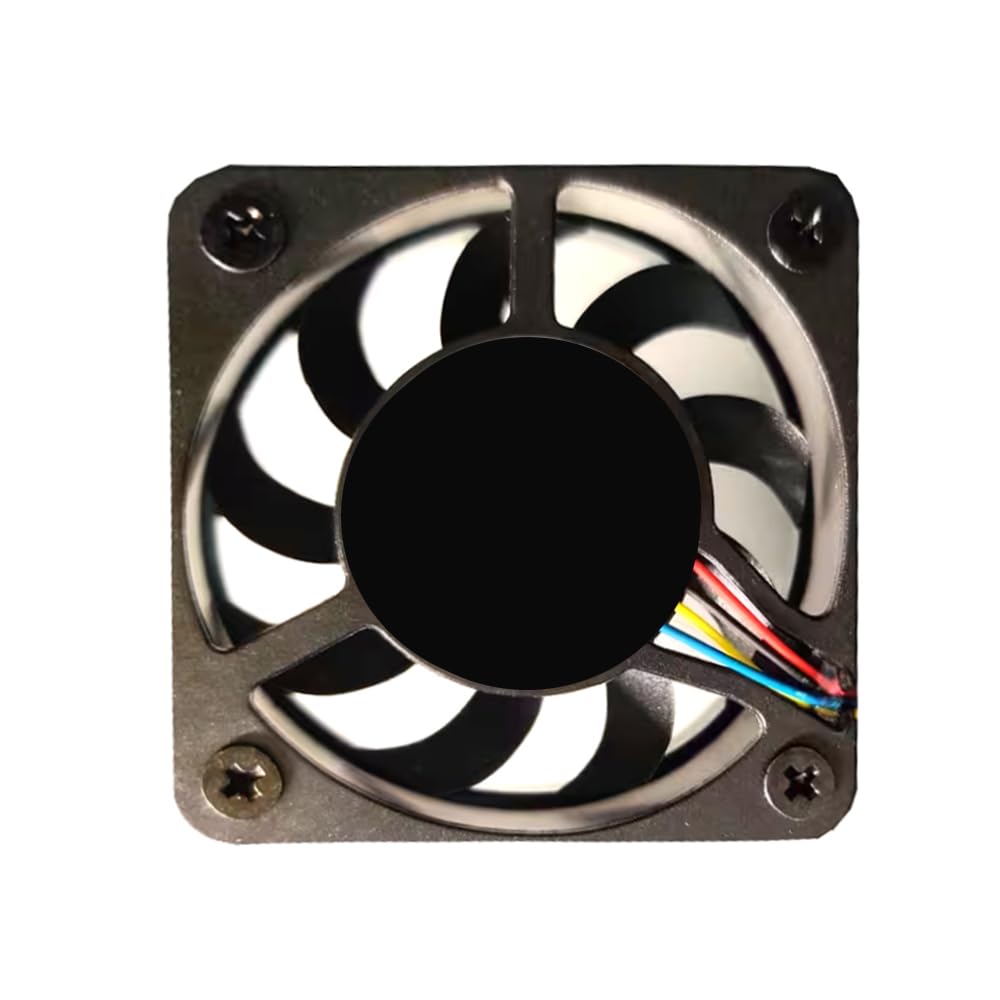
Image 3.1: The replacement cooling fan for GMKtec NucBox K7 Mini PC. This image shows the fan unit with its attached 3-pin power connector.
4. Installation (Replacement)
This section guides you through replacing the existing fan in your GMKtec NucBox K7 Mini PC.
- Prepare the Mini PC: Power off your GMKtec NucBox K7 Mini PC completely and disconnect all cables (power, HDMI, USB, etc.). Place it on a clean, flat, and static-free surface.
- Hapni Rastin: Carefully open the Mini PC case according to the specific instructions for your NucBox K7 model. This usually involves removing screws from the bottom or sides and gently prying open panels.
- Locate the Old Fan: Identify the existing cooling fan inside the Mini PC. Note its position and how it is mounted.
- Disconnect the Old Fan: Gently disconnect the old fan's 3-pin power connector from the motherboard. Observe the orientation of the connector and the wire sequence. E rëndësishme: There are many variations in fan interface wire sequences. It is crucial to compare the wire sequence of your old fan's connector with the new fan's connector. If they differ, you may need to re-pin the connector or consult a professional to avoid damage.
- Remove the Old Fan: Unscrew any mounting screws holding the old fan in place and carefully remove it from the Mini PC.
- Install the New Fan: Place the new replacement fan into the designated area. Ensure it is oriented correctly for proper airflow. Secure it with the original mounting screws.
- Connect the New Fan: Carefully connect the new fan's 3-pin power connector to the corresponding header on the motherboard. Ensure the connector is fully seated and correctly oriented.
- Mbyll çështjen: Carefully reassemble the Mini PC case, ensuring all panels are properly aligned and secured with their screws.
- Testoni tifozin: Reconnect all cables to your Mini PC and power it on. Observe if the new fan spins and operates quietly. You may use system monitoring software to check CPU temperatures.
Image 4.1: Close-up of a 3-pin fan connector. This image highlights the typical connector type used for this replacement fan, emphasizing the need to check wire sequence during installation.
5. Operacioni
The replacement cooling fan operates automatically once installed and connected to the Mini PC's motherboard. Its primary function is to dissipate heat generated by the internal components, particularly the CPU, to maintain optimal operating temperatures. The fan speed is typically controlled by the Mini PC's BIOS/UEFI or operating system based on thermal sensor readings.
6. Mirëmbajtja
Regular maintenance helps ensure the longevity and efficiency of your cooling fan:
- Heqja e pluhurit: Periodically (e.g., every 3-6 months), power off and disconnect your Mini PC. Open the case and use compressed air to gently blow dust out of the fan blades and heatsink fins. Hold the fan blades to prevent them from spinning rapidly during cleaning, which can damage the bearings.
- Inspektimi: Visually inspect the fan for any signs of damage, loose wires, or excessive dust buildup.
7. Troubleshooting
| Problem | Shkaku i mundshëm | Zgjidhje |
|---|---|---|
| Ventilatori nuk rrotullohet |
|
|
| Zhurmë e tepërt nga ventilatori |
|
|
| Mini PC overheating |
|
|
8. Specifikimet
| Veçori | Detaj |
|---|---|
| Markë | Gjenerike |
| Pajisjet e përputhshme | GMKtec NucBox K7 Mini PC |
| Vëlltage | 5 volt (DC) |
| Lloji i lidhësit të energjisë | 3-Pin |
| Metoda e Ftohjes | Ajri i detyruar |
| Materiali | Plastike |
| Pesha e artikullit | 0.5 Kilogramë (përafërsisht) |
9. Garancia dhe Mbështetja
This replacement fan comes with a Garanci 90 ditore from the date of purchase. This warranty covers manufacturing defects. It does not cover damage caused by improper installation, misuse, accidents, or unauthorized modifications.
For technical support or warranty claims, please contact your retailer or the seller from whom you purchased this product. Be prepared to provide your purchase details and a description of the issue.


