1. Hyrje
This manual provides essential information for the safe operation, assembly, maintenance, and troubleshooting of your PowerSmart 26-Inch 208cc Gas-Powered 2-Stage Snow Blower. Please read this manual thoroughly before operating the machine to ensure proper use and to prevent injury or damage.
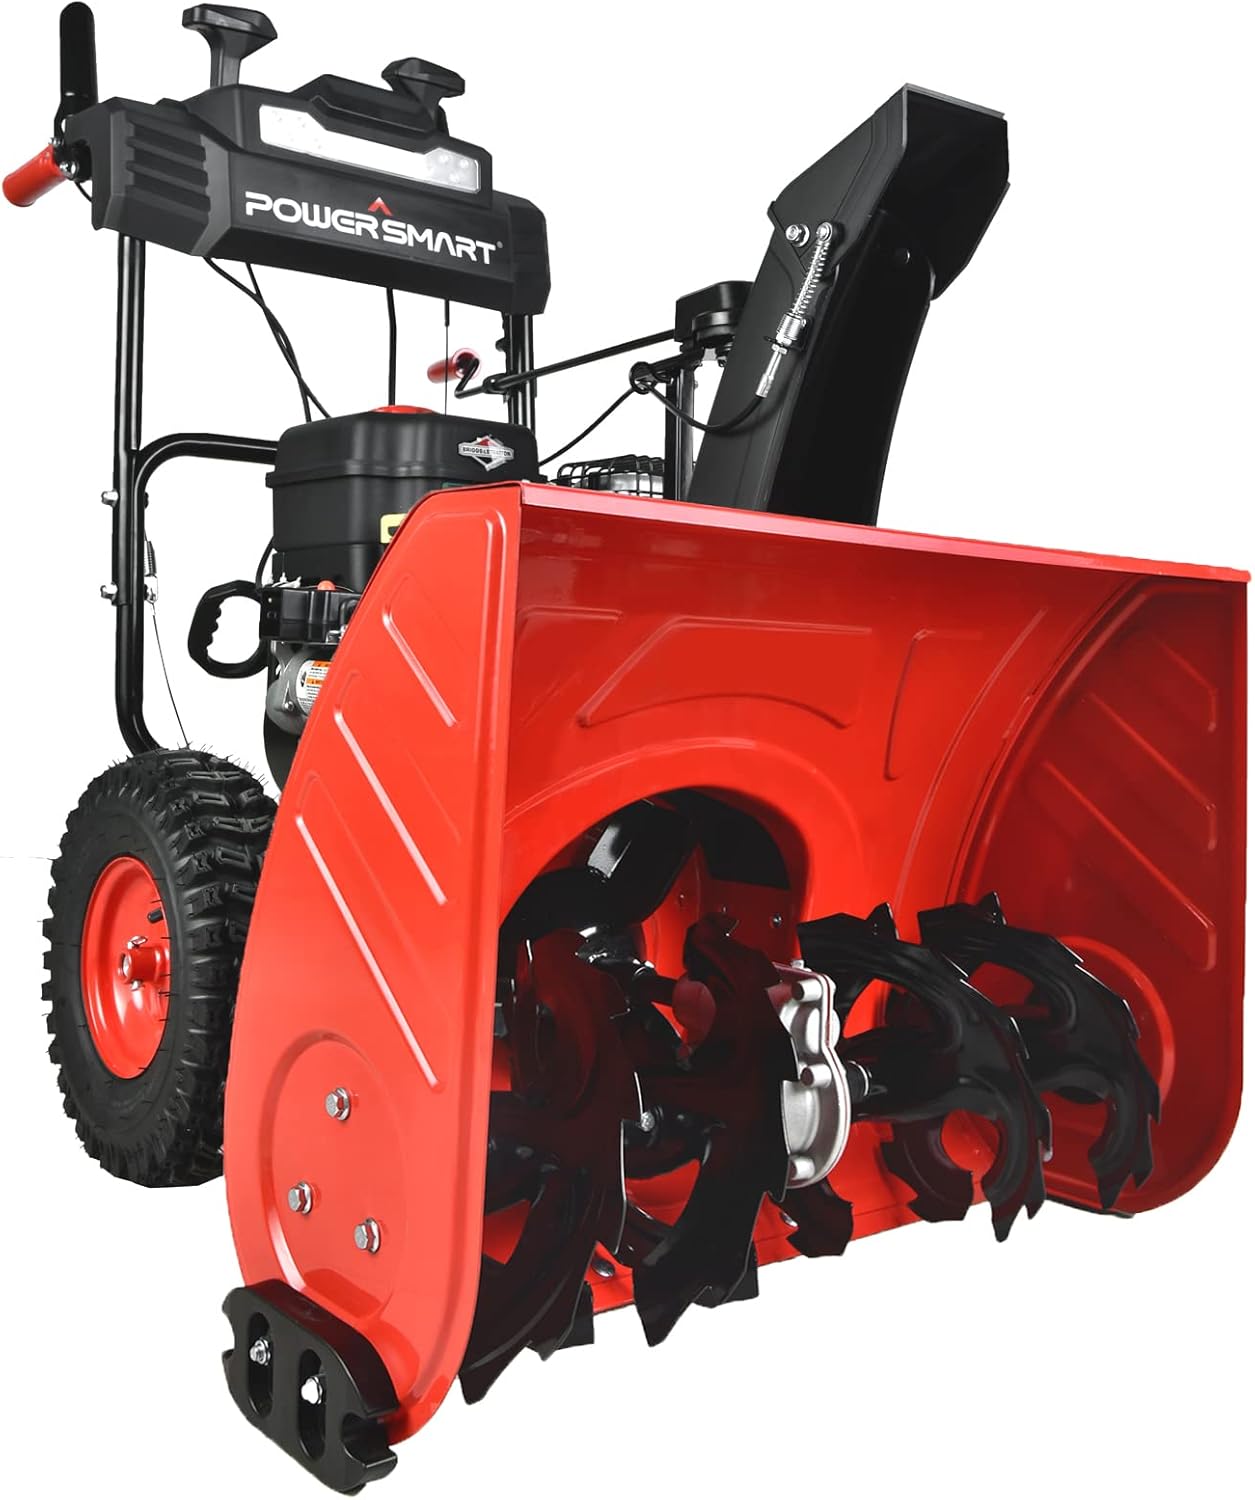
Figure 1: PowerSmart 26-Inch 208cc Gas-Powered 2-Stage Snow Blower. This image shows the complete snow blower from a front-side angle, highlighting its red and black design, large auger housing, and control panel.
2. Informacion mbi sigurinë
Operating a snow blower requires careful attention to safety. Always wear appropriate protective gear, including eye protection and sturdy footwear. Keep hands, feet, and clothing away from all moving parts. Never operate the machine without all guards and safety devices in place. Ensure proper ventilation when operating gasoline models to avoid carbon monoxide buildup. Store fuel safely in approved containers and allow the engine to cool completely before refueling or storing the unit. Be cautious when operating in reverse and always be aware of your surroundings. Refer to the full user manual for comprehensive safety guidelines.
3. Udhëzimet e Kuvendit
Your PowerSmart snow blower requires some assembly before first use. Follow these steps carefully. It is recommended to have a second person assist with lifting heavy components.
- Install the Upper Handle: Attach the upper handle assembly to the lower handle using the provided hex flange nuts. Ensure all cables are routed correctly and securely connected.
- Connect the Speed Control Rod: Secure the speed control connection rod to its designated points on the control panel and the engine.
- Attach the Chute Assembly: Mount the snow discharge chute and connect the chute control handle. Ensure the chute rotates freely and the control mechanism operates smoothly.
- Instaloni këpucë rrëshqitëse: Attach the skid shoes to the auger housing using the provided bolts and nuts. Adjust the height of the skid shoes according to the surface you will be clearing.
- Mount the Clean Out Tool: Secure the clean out tool to its designated storage location on the snow blower.
Video 1: PowerSmart 24-Inch Gas Snow Blower Installation. This video demonstrates the step-by-step assembly process for a PowerSmart gas snow blower, including attaching the handle, controls, and chute. While the model shown is 24-inch, the assembly steps are largely identical for the 26-inch model.
4. Udhëzimet e funksionimit
4.1. Lista e Kontrollit Para Operacionit
- Kontrolloni nivelin e vajit të motorit.
- Fill fuel tank with fresh, unleaded gasoline.
- Inspektoni për pjesë të lirshme ose dëmtime.
- Sigurohuni që të gjitha rojet e sigurisë të jenë në vend.
4.2. Nisja e motorit
Your snow blower offers both electric and manual pull starting options.
- Nisja elektrike: Connect an extension cord to the electric start port. Turn the fuel valve to the 'ON' position. Set the choke to 'FULL'. Press the primer bulb 3-5 times. Push the electric start button until the engine starts, then slowly move the choke to 'RUN'.
- Tërhiqe fillimin: Turn the fuel valve to the 'ON' position. Set the choke to 'FULL'. Press the primer bulb 3-5 times. Pull the starter rope firmly until the engine starts, then slowly move the choke to 'RUN'.
4.3. Kontrollet dhe funksionimi
The control panel provides access to all operational functions.
- Auger Control: Engage the left lever on the handle to activate the auger, which collects and discharges snow.
- Kontrolli i makinës: Engage the right lever to activate the self-propelled system. Use the gear selector to choose from 6 forward speeds and 2 reverse speeds.
- Chute Control: Use the crank handle to rotate the discharge chute 180 degrees, directing snow away from cleared areas. An additional lever adjusts the throwing distance.
- Heated Handles: Activate the heated handle feature for increased comfort in cold weather.
- Feneri LED: Turn on the integrated LED headlight for enhanced visibility during low-light conditions.

Figure 2: Heated Handles. This image highlights the heated handles on the snow blower's control panel, indicating a constant temperature of 131°F for user comfort.

Figura 3: Paneli i Kontrollit MbiviewNjë nga lart poshtë view of the snow blower's control panel, showing the gear selector, auger and drive control levers, and the chute control mechanism.
4.4. Clearing Snow
The PowerSmart snow blower is designed to clear snow up to 26 inches wide and 20 inches deep, with a throwing distance of up to 40 feet. Its 2-stage anti-clogging auger system efficiently handles deep and wet snow.

Figure 4: 26"x20" Clearing Capability. This image shows the snow blower in action, effectively clearing a path through snow, demonstrating its stated clearing width and depth.

Figure 5: Snow Blower in Operation. A person is shown operating the PowerSmart snow blower on a snow-covered driveway, with snow being discharged effectively.
Video 2: PowerSmart 24-Inch Self-Propelled Gas Snow Blower Operation. This video demonstrates the operational features of a PowerSmart self-propelled gas snow blower, including starting and snow clearing. The operational principles apply to the 26-inch model.
Video 3: PowerSmart 2 Stage Snow Blower BS26 - 360 Degrees View. This video provides a comprehensive 360-degree view of the PowerSmart 2-stage snow blower, showcasing dizajnin dhe karakteristikat e tij.
5. Mirëmbajtja
Regular maintenance ensures optimal performance and extends the lifespan of your snow blower. Always disconnect the spark plug wire before performing any maintenance.
- Vaj motori: Check oil level before each use and change according to the engine manufacturer's recommendations.
- Kandele: Inspektoni dhe pastroni ose zëvendësoni kandelën çdo vit.
- Rripat: Regularly inspect auger drive belt and wheel drive belt for wear and tension. Replace if worn or damaged.
- Shear Pins: Keep spare shear pins on hand. These are designed to break to protect the auger system from damage if an obstruction is encountered.
- Këpucë rrëshqitëse: Inspect skid shoes for wear and adjust or replace as needed to maintain proper clearing height.
- Magazinimi: At the end of the season, drain the fuel or use a fuel stabilizer. Clean the machine thoroughly and store it in a dry, protected area.

Figure 6: Snow Blower Maintenance Key. This image displays various replaceable parts and consumables for the snow blower, including engine oil, auger drive belt, wheel drive belt, shear pins, key switch, shave plate, skid shoes, plastic chute, spark plug, and clean out tool.
6. Troubleshooting
If you encounter issues with your snow blower, consult the following basic troubleshooting guide. For more complex problems, refer to the full user manual or contact customer support.
| Problem | Shkaku i mundshëm | Zgjidhje |
|---|---|---|
| Motori nuk fillon | No fuel, old fuel, choke not set, spark plug issue, kill switch off | Check fuel, replace old fuel, set choke, check/replace spark plug, ensure kill switch is in 'ON' position |
| Shkarkimi i borës është i dobët ose i bllokuar | Chute clogged, auger jammed, shear pins broken | Clear chute with clean out tool (engine off!), remove auger obstruction, replace shear pins |
| Machine does not self-propel | Drive belt loose or broken, drive control not engaged | Inspect/adjust/replace drive belt, engage drive control lever |
7. Specifikimet
| Veçori | Specifikimi |
|---|---|
| Markë | PowerSmart |
| Numri i modelit | PSS2260BS |
| Burimi i energjisë | Fuqia me gaz |
| Lloji i motorit | 208cc Briggs & Stratton 4-Cycle |
| Gjerësia e pastrimit | 26 inç |
| Thellësia ideale e borës | Up to 12 Inches (Max 20 Inches) |
| Distanca e Hedhjes | Deri në 40 këmbë |
| Numri i Shpejtësive | 6 Forward, 2 Reverse |
| Madhësia e rrotës | 13 inç |
| Pesha e artikullit | 140 paund |
| Dimensionet e produktit | 21"D x 26"L x 31"H |
| UPC | 817582018985 |
8. Garancia dhe Mbështetja
PowerSmart offers a 2 vit garanci on this snow blower. For any questions, concerns, or technical assistance, please contact PowerSmart customer support. We provide free lifetime tech support, a dedicated repair service center in the U.S., and 24-hour online support. Your satisfaction is our priority.


